Thursday 30 November 2006

Image storage - keeping them safe (part 1)


Where do you keep your digital images? On the computer's hard drive, on CDs or DVDs, or maybe on an external drive. But how safe are they? I have heard it said many times that image loss is a bigger problem with digital images than it is with film. I disagree for the following reason. Most film based images will one day show visible signs of ageing. Dye based images (colour and mono C41 films) will show deterioration first, but even black and white silver based negatives will age if not given proper treatment and storage conditions - how well did you fix and wash your negs all those years ago. Also, how many versions of your negs do you have? Most people don't have duplicates, and making dupes results in some loss of quality.

There is no doubt that keeping digital images safe is hard work. It is a pain. But it can be done, and if you take sufficient precautions your images could last indefinitely without any data loss at all. There are really three main risks to the prolonged life of your digital images.

The first is media failure, where for some reason the disk can't be read in the normal way. With CDs & DVDs this may be because of the affects of ageing on the disk. Some CDs have been known to become unreadable in less than two years. CDs and most DVDs are also vulnerable because the writing surface is unprotected from handling - fingerprints, scratches and dust. Hard disks normally fail due to some sort of mechanism failure meaning that the information may still be on the disk but can't be accessed, or the disk itself may be damaged.

The second threat is corruption of the data on the disks, which could be caused when writing or copying them or if some sort of problem occurs with the computer (such as a crash or virus infection).

The final danger is from external influences such as fire, flood or theft. I lump these together because the solution is the same for all of them. In brief you will need a version of your images which is remote (not in the same building, or even same area if flooding is likely) from your normal storage.

In fact there is a fourth risk. It is called human error. More of that another time.

Having dealt with the risks here, I will look more closely at the solutions in the next part - coming soon.

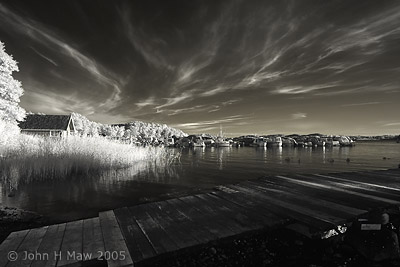
Image: Lake District 2005 (goes all the way to the Lake District and photographs grass, of all things)

Tuesday 28 November 2006

The Online Photographer is one year old


Happy first birthday to The Online Photographer. Michael Johnston's blog started one year ago. If you haven't seen it you might like to have a look. An article that came out in June 2006 called Great Photographers on the Internet is particularly amusing.

Photo taken in Granada 2006 (modified version)

Wednesday 22 November 2006

Assessing photographs in the digital world


Isn't digital wonderful? Once we had to process images before we could see them at all (and I am not referring to using a RAW converter). If you didn't want to do this yourself you could take them to a lab, and they could lose or scratch them for you (and charge you for the privilege). Now the things pretty much pop straight out of the camera. And we view them differently too. At one time you made a print to see for sure if the image was any good or not. Now you can examine the image on screen much bigger (or at higher magnification) than it will ever be reproduced on the printed page.

But I think that this has changed the way we assess photos. Image quality seems to be about scrutinising image noise and sharpness at 100% on-screen magnification, rather than the more subtle appreciation of tone and that hard to define "feel" in an image. Was it always this way? I think not. But if not, why the change in emphasis? Maybe just because these are fairly easy parameters to use by way of comparison. But being easy doesn't make them useful, just as judging a camera simply by the number of pixels it records doesn't tell the whole storey or even the best bit of it.

Let's leave the camera makers to worry about noise, and get back to trying to appreciate those things that make an image stand out.

Image: Grasmere - Lake District 2005

Tuesday 21 November 2006

Lenses - Through the fish's eye


As well as a choice of lenses of different focal lengths, used in order to capture a wider or narrower field of view, there are also some lenses that are chosen because they have characteristics unique to their particular type. One such is the "fisheye" lens. Most people know what an image taken with a fisheye looks like. Lines that should look to be straight in the normal world are rendered as curved (well most are) and the lens can take in a very wide field of view - normally about 180° - remember to keep your feet and fingers out of the picture.

There are in fact two types of fisheye. Full frame fisheye lenses (see example above and in previous piece) fill the rectangular frame with the image. The normal focal length for these lenses is 15 to 16mm. Circular fisheye lenses produce a circular image (in fact all lenses do, but we normally see just a rectangular part of it) and leave the rest of the frame dark. Lenses of this type are often around 8mm in focal length.

As I have already said, using a fisheye bends straight lines, but it doesn't always to this. If a line goes through the centre of the lens it will not be bent. As you will see in the image above, the pole cuts through the centre of the image (made easy by aligning the centre focussing point in the viewfinder), and the wires are either straight or nearly so. But take a look at the horizon. That has been bent in an extreme way that characterises a fisheye image. So by careful selection of where elements are placed in the frame we can choose to bend them or not. There is also a tendency for fisheye lenses to produce a rather nice starburst type flare if the sun or similar point light source is within the image - again see the image accompanying the previous piece.

Image taken with a fisheye lens near Turville (Chiltern Hills) 19/11/06

Monday 20 November 2006

Doing it with flare


Flare in images is often seen as a problem. But what is flare anyway? Flare is light reflecting between the surfaces of the elements of the lens in a way which either causes patterns across the image, or just a general reduction in contrast. It sounds like something we would want to avoid, and sometimes (maybe often) it is. But is it always such a bad thing?

Sometimes we are confronted by a scene in which the intensity of the light is an important part of the feel that we want to convey. But when the image is reproduced on paper or on screen that feeling of intense light is lost. Particularly in the case of prints the greatest intensity that can be expressed is the unprinted white paper. Even with the screen which is backlit we are not overwhelmed by the brightness. Maybe flare could be useful after all. This partly depends on the kind of flare that results from the use of a particular lens, and also the content of the image, but just keep in mind that flare could be a useful device and be prepared to embrace photographic flare.

The image above was taken with no filters (that's right, not even a starburst filter) but with a fish-eye lens. More on this soon. Turville 19/11/06

Friday 17 November 2006

Follow-up on filters


I thought I would just put up a couple of shots to show the use of two different filters. The first shot was taken using a Lee PL-L polariser to darken the sky and help the clouds to stand out. Without this, the cloud formation was not very pronounced. Note that because the polarising effect on the sky is stronger at a right-angle to the direction of the sun, and I was using a wide angle lens the sky does not look evenly dark from one side of the image to the other. This is seen as a problem by some. Make your own decision on this.


The other similar framing of the scene was taken using a Lee 87 IR filter and infrared modified camera (Canon Rebel XT). The darkening of the sky caused by the IR filter is more even from left to right when compared to the polarised shot. The shots were taken in the evening, with the sun quite low in the sky (Norway 2005).

Thursday 16 November 2006

Filters - Do you need them?


Camera shops must love filters. There are so many on the market, but I bet that the majority spend very little time in front of your lens. Is this a good thing, or should you be making better use of that "tobacco grad" that you bought two (or was it twenty) years ago? Of course there is no right or wrong, but I prefer to be sparing in my use of filters. Unless there are special circumstances, I normally carry four filters with me. Two of them are polarisers - one a screw-on one and the other a 4" Lee filter. I also carry a HiTech neutral density (.6 ND) graduated filter (this filter is clear at one end and gives a two stop reduction in transmitted light at the other) and a Lee 87 for use with an infrared modified camera as described in my piece on infrared digital photography (Shooting with an IR Rebel). I work on the principal that if it is obvious that a filter has been used you probably shouldn't have used it (the exception being for infrared), but also remember that rules are made to be broken.

Polarisers darken blue skies, suppress reflections and so often give the appearance of better saturated colours. ND graduated filters are normally used to reduce the contrast range within an image - for example when photographing a landscape if you find that the sky is too bright, you might otherwise have to darken the whole image or risk burning out the sky. The use of an ND grad would allow you to darken the upper portion of the image - the sky - without changing other parts of the image.

A word of warning. I understand from various sources that some of the inexpensive slot-in ND filters that are commonly available are not truly neutral (not an accurate grey), and may result in a colour cast in your image. This could be a problem particularly with a graduated filter. I believe that this was an issue familiar to users of Fuji Velvia film in particular, but may also be a problem for digital camera users. I have no personal experience of this as I do not have any of these filters. It does not occur with the better makes, but unfortunately they aren't available through most high street shops so you would need to find a specialist supplier.

I shall cover more on the use of polarising filters soon, including the difference between linear and circular polarisers, and also how to get the best from them.

I don't use UV or skylight filters (there may be one in a draw somewhere), nor do I keep any sort of filter over the lens for protection (sometimes referred to as an "optical lens cap"). Again, this is a matter of personal choice and also may be influenced by the conditions in which you work. For instance, if I were photographing a lot of coastal scenes I would probably use one as a protection from salt spray. As it is, I find that the use of rigid lens hoods is usually enough to protect the lens from harm and the only frequent cleaning that the lenses need is with a good quality blower (Giottos Rocket). I am in two minds about the use of UV filters for another reason. UV filters cut out UV light - hardly surprising. This reduces the appearance of atmospheric haze which may be visible in distant scenes. Sometimes you want to reduce this haze, but not always and since this is something that I often find very appealing - and can sometimes add to a sense of depth in an image - I see no reason to remove it in many images. If you chose to keep a filter in front of the lens it is probably best to use a good quality multi-coated one.

So to sum up, you will see that choice of filters is very personal. My choice will likely not be yours, but it is important to consider the use - and the purchase - of filters carefully. In many cases it would be better to spend the money on a train ticket to somewhere new and take some photos you would not otherwise have taken.

Image taken in Norway 2005

Tuesday 14 November 2006

Lenses - Focal length and angle of view


Camera lenses are normally referred to by their focal length (in millimetres). Most people understand that the shorter the focal length (lower number) the wider the field (or angle) of view. But focal length in itself does not determine angle of view. Lets start at the beginning.

Focal length is simply the distance from the optical centre of the lens to the image when focused at infinity, so that the optical centre of a 50mm lens is 50mm form the film or digital sensor when the focussing scale is on the infinity mark. But the reason why this is not the whole story regarding angle of view is because we have several camera formats. Actually, lets really go back to the beginning. Some of the first cameras (at least loosely) were in fact rooms (camera obscura meaning darkened room or chamber) with a hole facing outside - in essence a giant pinhole camera. Now imagine that you were in this darkened room. The focal length would be the distance from the hole to the opposite wall onto which the image was projected (upside down). Now lets say that you had a choice of different sized sheets of light sensitive material. If you pinned a big sheet to the wall you would record a wider field of view than if you chose to pin a smaller sheet to the wall. So it is with different camera formats.

Digital compact cameras have tiny sensors and therefore record from a tiny image area. Cropped frame SLRs have sensors similar in size to APS film (so smaller than 35mm). Full frame digital SLRs and all 35mm film cameras have an image area of 24mm x 36mm. There are both film and digital formats above this, and these are commonly used where high resolution imaging is needed. For the reasons mentioned above digital compact cameras with very small sensors need lenses of much shorter focal length to get an equivalent field of view to larger format cameras. As another example, a 90mm lens on a 35mm film camera is on the long side of normal, on a medium format film camera (say 6cm x 6cm) it is near to normal, but on a 5" x 4" large format film camera a 90mm lens is a wide angle. Same focal length. Different image area hence different field of view.

For a more in-depth description of angle of view you may wish to read this article aptly entitled "Angle of View" and for more on the implications of using different lenses how about reading "How to choose the best lens for a specific composition". More on lenses coming up soon.

Image taken in High Wycombe, December 2005 (the day after the Buncefield explosion)

Monday 13 November 2006

Article alert

Alain Briot has an article up on "The Luminous Landscape" entitled "The Eye and the Camera". Want to know why the camera sees the world in a different way from you? Set aside some reading time and pay a visit.

Image size and DOF


As a little follow up to my piece highlighting issues raised elsewhere on the internet about depth of field (DOF) I thought I would add something about the consequence of reproducing the same image at different sizes. With each post (at least so far) I have added a picture, sometimes to illustrate a point, and more often just as a form of decoration. These images are put up quite small (400 pixels on the largest side) and are resized from much larger images and then sharpened - as I would with any image.

In some cases, reducing the size does things to the image other than simply make it smaller. Several of the images are modified to make them "work" at this size. In particular it has an impact on depth of field. Two images that I previously put up serve as an example of this. The one of droplets on a web (part of the piece on "Chasing pixels") is a crop from a larger image. Had I shown the whole image reduced in size it would not have made the droplets to the left and right hand side look as soft and out of focus. The whole reason that I took the image at an angle rather than straight on was to play with selective focus. This didn't really show up when the image was reduced, but cropping the image and only reducing the size a bit kept more of the feel that I wanted, although cropping bits off still reduced the effect to some degree as the bits at the edge were even softer.

The other example is the image that accompanied the previous article on this topic (DOF - Does it need fixing?). The full size image has relatively shallow depth of field. For example the bird in the distance is noticeably soft in the full size image, yet looks quite sharp in the smaller one. I have reproduced part of the image here at the sort of size at which it might be printed, so that you can compare.


In fact the only time depth of field is not affected by size of reproduction is when it extends from front to back in an image even at full enlargement. Just something else to think about.

The image at the top of this piece was taken in Norway in 2005

Friday 10 November 2006

Travelling light (part 2 - followup)


Just a little update to my second post about downloaders. In the second part of this piece I mentioned that some Vosonic devices (in particular the VP8360) were likely to have user replaceable hard drives. I notice that on the Vosonic site it refers to an "upgradable 2.5" hard drive" and also to it as being "customer swappable". Similarly the batteries are easily obtainable and not specific to this device only. It is such a refreshing change from the attitude of some of the bigger manufacturers such as Epson, Jobo and others. Digital camera file sizes are rocketing up, and I hope more and more people are saving RAW files, so it is very likely that a device with adequate storage now will seem a bit limited in the near future. Some manufacturers seem to think that you will just go out and buy another downloader from them at several hundred pounds. Vosonic appear to have more respect for their customers, and realise that they can't keep putting their hands in our pockets every few years. Good move.

Infrared image taken in Norway 2005

Shooting with an IR Rebel (digital infrared photography)


Invisible light photography. Have you ever wondered what it would be like to take photos using light that you can't see. Well, you may have seen that a couple of the images that I have put up to accompany my blog have been taken with an infrared modified camera (a Canon Digital Rebel XT, or EOS 350D as the model is known over here). I will detail a bit about using this camera and the reasons for choosing it. Clearly this is in no way a review of the camera functions. In almost every respect it is a normal camera, and there are plenty of reviews. If you were to put it beside a normal Rebel XT it would look identical, and the menus and controls all work in the same way. The only change is that it has had its infrared (IR) blocking filter replaced with one that allows IR light to pass (just taking out the filter would not enable the camera to focus to infinity). If someone were to pick it up and use it in the normal way, he or she would notice nothing different until they came to view the image, at which point they would probably wonder why someone had poured diluted tomato soup into the camera - images taken without a filter come out with an orange/red cast.

The technique for making IR images on film is to use a specialised film that is sensitive to both visible and IR light and then use a filter to cut out as much of the visible light as is desired. Some photographers favour a dark red filter (so combining the red end of the spectrum with IR for a shorter exposure time), but I have always preferred to use a visually opaque filter (Lee 87) and cut out all the visible light, relying on the IR light for the whole exposure.

When I first went to digital I experimented with a normal camera. I used a Minolta Dimage 7, which had quite good sensitivity to infrared (seen as a problem by most people, including Minolta themselves). I also tried several Canon SLRs. The IR filtration on Canon's cameras is so severe that to get a decent exposure outside at 100 ISO at f8 would often require a shutter speed of around 15 minutes (and if you let it do it's long exposure noise reduction - taking a blank frame of the same duration after the exposure and subtracting the noise - that became half an hour). After all of that I can tell you that the results weren't good.

I placed an order for a modified EOS 350D from Hutech in the USA (which is why it is badged as a Rebel XT, the name under which it is sold in the States). When it arrived I was interested not only in the image quality, but curious to see what sort of shutter speeds would be needed. I was confident about reducing the 15 minutes for the normal camera, but by how much? Using Konica IR film and the Lee 87 filter the exposure times had often been around 30 seconds. Would they be as good as that? Not only were they much shorter, but I was amazed to find that I could use the normal meter (before putting the filter over the lens) as a guide. The amount of visible light is never an absolute guide to the IR levels, and light meters don't measure IR, but I have found that I am normally within about two stops and can simply fine tune my exposure to suit. In other words the camera is about as sensitive to IR as it is to visible light. As you can imagine I was amazed and delighted. The other huge surprise is that the camera will even focus through the filter, as long as it has something with good contrast to lock on to. On most lenses IR light focuses at a different point from visible light, and so some lenses have a mark on them to help you to make a compensation. Some lenses don't. That is not a problem with this camera. Finally, because of the need to put an opaque filter over the lens it is not normally a good idea to hand hold, so a tripod is needed as a framing aid, if not for stability.

So what results do you get. Straight out of the camera the image looks incredibly red/magenta. I have the camera set to save RAW files and I think this is essential (and I really do mean essential) for good results. I have tried several RAW converters, but now use DXO Optics Pro. In spite of its quite horribly designed controls and layout (don't get me started) it gets the best results that I have seen. Capture One comes a close second with Camera RAW (Adobe) surprisingly not handling the extreme colour correction as I would want. The images that result are not truly monochrome. There are differences in wavelength, but of course these are beyond the visible spectrum, so there is no such thing as true or correct colours. With the colour enhanced a bit and the image balanced, skies tend to look a bit yellow, and trees look a bit blue. It is quite easy to reverse this if desired.

Infrared image taken in Norway 2005

Wednesday 8 November 2006

Chasing pixels


I see that Sharp Corporation has just announced a new sensor for compact digital cameras. It boasts a pixel count of 12 million, and cameras with this sensor will find their way into the shops before long. Other manufacturers will surely follow. Does the thought of a 12 megapixel compact fill you with excitement? Does it make you want to rush out and upgrade your current model? Sharp obviously thinks that it will. But do more pixels inevitably make for a better camera?

Compact cameras almost all have very small sensors. In most cases when a model comes out to replace the previous one, the sensor is the same size, even if it has more pixels. The only way to accommodate these extra pixels is to make them smaller. There is a disadvantage to doing this. The smaller each pixel, the less light hits it. It is therefore less sensitive. This is clearly not helpful, so the ISO is increased by amplifying the signal. This in turn causes the signal noise (that occurs in any circuit) to become more apparent, taking the form of false colours seen in the image.

Compact cameras are at a disadvantage to digital SLRs because the latter generally have larger sensors, and therefore bigger pixels. As an example and to give some idea of the extent of the difference the Canon Powershot S70 compact camera has a pixel pitch of 2.3 microns. The Canon EOS 20D (Cropped frame SLR) has a pixel pitch of 6.4 microns and Canon EOS 5D (full frame SLR) has a pixel pitch of 8.2 microns. This means that each pixel in the 5D is about 4 times the size of the S70 pixels, and therefore in the region of 16 times the area and so receives about 16 times more light.

My description has of necessity been brief, and to some degree simplified. For more reading on the subject the Canon web site has a useful article, and for serious in-depth information take a look at Roger Clark's site - just stop reading when your head hurts :-).

Consider what you are going to do with those extra pixels. Will you be making very big prints, or maybe you want the flexibility to be able to crop much of your original image away? If not, all the extra pixels do is take up space on your card and on your computer. Even if the noise issue didn't exist, it is unlikely that the new cameras will have lenses of sufficient quality to make good use of the pixels, which leaves one wondering why manufacturers do this. The only answer seems to be that they believe that it will help them sell more cameras - to you.

The image above was taken in Denham Country Park (6th November '06)

Monday 6 November 2006

Travelling light (part 2) - choosing a device


As I mentioned in part one of this piece, I now take two downloaders with me when I am travelling with the intention of taking photos and the same images are written to both of them. One device is a "SmartDisk FlashTrax XT" with 80 GB of capacity.

The plus points for this device are as follows (from my personal point of view): Clamshell design keeps the screen protected when closed in the same way as a laptop computer - very useful when on the move. Very long battery life. Ability to read a wide range of RAW files. High storage capacity for the price (and it is possible that an even bigger drive could be substituted at a later date although doing so would void the warranty).

The weak points compared to some similar devices are: Somewhat poor quality screen image compared to some competitors - fine for checking images, but not so good for assessing their exposure or appreciating them aesthetically. Somewhat dated design. Not quite as compact as some others.

I also take a "Digital Camera Partner" as my backup device. In spite of the rather "chummy" name, this is a simple and somewhat minimalist gadget, which does not allow viewing. In fact it has no screen at all, but communicates it's status by means of a row of coloured lights. It does have one great advantage, and that is that it can be purchased without a hard drive. Of course it is no use without a drive, but the fact that it is "user installable" indicates that drives can be changed round easily. This gives it almost unlimited storage capacity, as all you have to do is take a number of laptop hard drives and swap them out as each is filled. Very flexible. It also means that you can buy your own hard drive (or take it out of a dead laptop), which may help to keep costs down. There are many similar products around, particularly on eBay.

So what are the alternatives? There are many, but I will concentrate on ones with colour screens (the more expensive ones) as they have more features that need explaining. The first one (in fact four) to consider is the Epson series of devices. The original one was called the P2000. It is still on the market and comes with a 40 GB drive and a truly superb screen. Epson introduced the P4000 with an 80 GB drive some time ago. To coincide with Photokina 2006 Epson introduced the P3000 and P5000. Still 40 GB and 80 GB capacity, the most noticeable difference is a slightly bigger screen and an increase in display quality (did it really need it?). The screen remains relatively unprotected in transit (it comes with a soft case) and I know of one P2000 that ended its life when something fell and damaged the screen.

The next on the list is probably the "Jobo Giga Vu Pro Evolution" - nice device, long name. Available in capacities of 40 GB, 80 GB and 120 GB. I haven't seen one, but reports suggest that the display on this is in a similar league to the Epson P2000/P4000. Although not a clamshell design, it comes with a clip-on hard plastic lid to protect the screen. Jobo also produce the "Giga One" which is a much simpler device, with status screen only.

Vosonic produce a bewildering range of suitable but varied devices. The one that has recently attracted my attention is the VP8360. It looks to have a good-sized screen. It is available in capacities of 60 GB, 80 GB and 100 GB, but I have seen it advertised through one outlet without a drive, indicating that it may be another device to offer easy hard drive swapping (see my updated comments). I am keen to get my hands on one of these to see the screen quality for myself, and when I do I will likely put a mention here.

Another announcement timed to coincide with Photokina was that of the Canon Media Storage M30 and M80 (have a guess at the capacities of these two devices). These look set to compete head on with Epson. One bonus for owners of Canon cameras such as the EOS 5D, 20D and 30D is the fact that these downloaders use the same battery.

There are lots of other products on the market, but I will mention only one. It could be that you already have one of these. The latest (full size) iPod comes in capacities of 30 GB and 80 GB. It has a rather nice screen, although it is not as big as the best of the dedicated downloaders. With the addition of a small adaptor (iPod Camera Connector) you can connect an iPod to your camera using the camera's USB cable. Not only are they very compact, but if you have one already then this would be the cheapest option of all.

Finally it is worth mentioning that almost all of these products have additional functions. Most play music and video, so can be used to watch films. Some (the FlashTrax is an example) pick up FM radio too. They can also be used as additional storage for your computer.

The image above was taken in the grounds of the Alhambra Palace in Granada, Spain, September 2006

Sunday 5 November 2006

Slow shutter speeds - unfreezing the still image

The still photographic image is the freezing of a moment in time. Yet throughout the history of photography there have been many attempts to portray the one thing that it might seem that photography could not show - movement.


First image taken at 1/60 sec f5 ISO 3200


Second image taken at 10 sec f16 ISO 50


Normally when we take photographs we tend to use fairly high shutter speeds. If the camera is being hand held this is necessary to prevent camera shake from being visible in an image. But this often renders everything looking completely still. This is not a criticism. Sometimes it is the best solution. But there are times when in order to convey that a person or object is moving, we need to use longer shutter speeds to emphasise that movement. The basic technique takes several forms. We can place the camera on a tripod and simply leave the shutter open for a longer time. Of course this will cause over-exposure if there is not a compensation made, either by reducing the aperture size, by reducing sensitivity (ISO), by using neutral density (ND) filters or by choosing a time of day when there is not much light (or a combination of several of these measures).

A second technique is called panning (frequently used in sporting events), where the camera tracks the subject, blurring the background to create streaks in the direction of travel. Again, depending on the speed of the subject, a tripod or monopod is often used.

A third technique is referred to as "slow-sync flash". This produces a sort of double image or composite. Again, I have seen this used in sports photography, particularly in mountain bike racing, and the results can be very impressive. The exposure for available (ambient) light is set to give a long shutter speed and normally to slightly underexpose. The speed is too long to completely freeze any part of the image. However, an additional exposure is recorded by the flash, which will render parts of the image sharp, particularly if they are close to the flash, as they receive more light.

The key to mastering any of these techniques is considerable experimentation and practice. Start unfreezing your photographs now.

Travelling light (part 1) - image storage on the move


Like many people I spent part of the summer travelling away from home, to new and unfamiliar places. In my case this wasn't a family holiday but a photographic trip, so I intended to spend most of the time taking pictures, and would therefore expect to have hundreds or even thousands of images to store by the time I came back. One of the big advantages of digital capture is that you can take as many images as you like, unhindered by thoughts of cost (or anything else for that matter), and I see no reason why this should be any different when away from home. But to many people this poses a problem. What do you do with the images once your card is full.

Well you could buy more cards, and for those who are taking just a few images during a whole trip that may be enough. But for the serious photographer that would require too many cards and so be an expensive option. You could travel with a laptop, and some people do. But I wanted the flexibility to use all my luggage space for photographic gear, and not computers, so I needed something else. A few years ago I bought something called an "Image Tank" - a make of downloader, or image storage device.

It was a fairly simple device with only the minimum number of buttons. There was no way to view or verify images on the device, as it had no screen but only a simple LCD status display. I used this device until last year. I was in Norway and downloaded some images from a Microdrive. The Image Tank showed that a problem had occurred with the download, but I didn't know what the problem was. I continued to download throughout the rest of the trip, although I avoided using the Microdrive again. It was only when I returned to England that I found out that all the subsequent downloads had been corrupted. Luckily I still had most of the images elsewhere.

This year when I travelled to Spain I took two downloaders. The Image Tank was not used. Of the devices used on that trip, one is similar to the Image Tank (but lighter and with a shorter download time) and has no screen. The other has a 3.6" colour display, on which the images can be viewed and therefore verified. Each evening I would download to the device with the colour screen, go through all the images to check that they where OK and then download to the other device as backup. Only once this was done where the cards re-formatted. The two devices were kept separate at all times, particularly when I was on the move. During the flight back one of the downloaders was stored in my camera bag and the other in my coat pocket. Neither was entrusted to the gentle care of the baggage handlers.

In the next part I will go into more detail about the devices that I use, and some of the other options on the market.

Photo taken in the Sierra Nevada in September 2006

Thursday 2 November 2006

DOF - Does it need fixing?


Digital photography has caused many people to rethink how they approach picture taking. At the start everything seemed new and there was a lot to learn very quickly. But after a while most of us thought we had a pretty good grip on the situation and started to relax. But you can't relax for very long. Every now and again someone comes up with something that makes you feel that you hadn't considered every aspect, or that's how it is for me anyway.

An article (actually two) that did this for me recently appeared on The Luminous Landscape, entitled "Focusing in the Digital Era" by Gary Ferguson. In brief it says that depth of field (DOF) with digital cameras can't always be approached the way it was in the days of film (it says a lot more than that - go read). Part of the content came as no surprise. Depth of field scales on lenses designed for film will not be a good guide if we are making substantially larger prints. But that is just down to the maximum acceptable size of circles of confusion (if that confuses you read "Understanding Depth of Field", or even better read chapter 3 of "Basic Photography" by Michael Langford).

As is so often the case, the proof of the pudding is in the eating. So I started to look again at some of my images with this new information still ringing in my ears. Would they be inadequate in the DOF department? Had I just not noticed in my infatuation with this new(ish) digital medium? I have to tell you I was a bit nervous when I started checking. I don't think I need have been. So far I have not found any of my images spoilt by inadequate depth of field (spoilt by plenty of other things though), but I shall keep watching.

So is this a case of "if it ain't broken don't fix it", or was Gary Ferguson drawing out attention to a previously unknown danger. My feeling is that the truth lies somewhere in between, and that his suggestions (particularly regarding infinity focussing) can be seen as another tool in our armoury of techniques, that will be useful when the right circumstances arise.

Picture taken in Granada, September 2006