Saturday 23 December 2006

Signing off for 2006


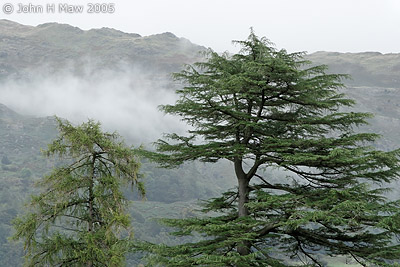
I just wanted to put up one more image for 2006. Not particularly a Christmas image, but one taken yesterday in the mist/fog that for so many people is an impedance to their daily lives. I put a camera and a few lenses into a small backpack and cycled around in the woods near to my home. This is part of what resulted.

I was going to post here a Christmas list to Santa. It was going to contain all the things that I would like in terms of technology and product features for the future. The only problem was that I could only think of one thing that I would like (much to my own surprise), and since one thing doesn't make much of a list I abandoned the idea.

Just in case Santa is reading this blog (I'm told that he does) here is my request anyway:

"Dear Santa.

I would be very grateful if you could arrange that my next digital SLR has eye control focus (please pass this one on to Mr Canon). I know people thought it was a gimmick, but I found it very useful. It even worked with my specs and in combination with predictive autofocus it made stage photography with dancers much easier. I had it on my first auto-focus camera (Canon EOS 5) and I miss it.

Thanks, and don't overdo it on the mince pies."

Well, that's it from me for 2006. See you in 2007.

Tuesday 19 December 2006

Photoshop CS3 Beta - problems

It seems that there are a number of issues with the new Photoshop CS3 beta - not surprising, that's why it's a beta after all. Some people are having their serial numbers rejected by the generator, particularly those using academic licenses. There are other problems too. For more information you may wish to visit this page on MacFixit. This site is intended for users of Apple machines. I'm not sure where Windows users go for help (other than the Apple Store. Oops - sorry).

Sunday 17 December 2006

DXO Optics Pro v4.1 and Photoshop CS3 beta


Swings and roundabouts, chalk and cheese, decisions, decisions, decisions. DXO Optics Pro v4.1 was released on the 4th December. On the 14th Photoshop CS3 was released in beta form. I mention them in the same piece, not because they are direct competition for one another, but because there are areas of overlap.

I have owned DXO Optics Pro (just DXO from now on) for some time, but didn't really make good use of it because I found it a very frustrating program to use. But it has evolved and I find version 4 much more user friendly than version three (not hard considering how bad the controls were on v3). The headline feature is probably what is known as the "Optics Engine". To understand what this does you need to know that the chaps at DXO make something called DXO Analyzer. This is used to evaluate and quantify characteristics for particular lenses. Things like distortion, resolution, sharpness and vignetting are all expressed in numerical form. What this means is that the people at DXO know quite a lot about the behaviour of your lenses. They know where they fall short of the ideal and that means that many of the shortcomings can be corrected in software. The Optics Engine corrects lens distortion, vignetting, lens softness and chromatic aberration. It is no exaggeration to say that it is like having better lenses (this engine only works with specified lens/body combinations - more are being added all the time).

However DXO can now do amazing things with highlight and shadow detail and all manor of other controls, including a very good local contrast feature that I particularly like. DXO is also a RAW converter, so all of these changes can be applied before converting from the RAW file. For more information on DXO you may like to read this review and also visit the DXO web site. You can download a full 21 day demo here.

Photoshop CS3 beta (code name Red Pill in case you are interested) has a number of enhancements on previous versions. Greater selection ability with the "Quick Selection Tool" and "Refine Selection Edges", filters applied to smart objects and a lot more (Adobe lists major enhancements here, but there are many other small but helpful changes). But Photoshop also has a RAW converter called Camera RAW, and it is here that it overlaps with DXO. You can download the Photoshop CS3 beta which for registered users of Photoshop CS2 will run until the full version is released, but for those without a valid serial number only for 2 days (although it says 30).

Camera RAW (CR) has been improved. Some changes just make it more intuitive, but others run deeper. It will even edit TIFF and Jpeg files (as can DXO). But the most important point is that the better and more capable the RAW converter, the less has to be done post conversion. This should lead to less data loss and even quicker workflow. So it seemed like a good time to see how the two compare, how similar a result I could get and which I would prefer.

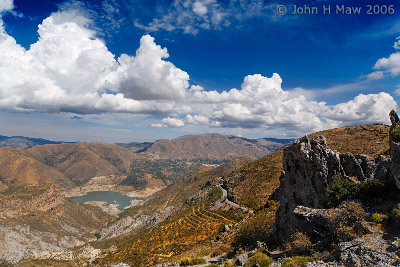
Unfortunately the results aren't clear cut. As already stated DXO has tricks that CR doesn't in terms of correcting failings of the lens. But the images that I used for comparison showed that overall one image may look better converted in one program and another image may be best converted in the other. In the landscape image that I am showing here I preferred the overall look and the contrast of the DXO image. The sky has more subtle detail particularly in the rather wispy clouds. But in many areas CR has caught up with DXO since I last did a test and the CR image was sharper than the DXO converted one. This last point would only matter if trying to reproduce the image at close to maximum size. Of course a DXO image can be saved as a DNG and the RAW conversion done in Photoshop. As I say, decisions, decisions, decisions.

The shot here was taken in the Sierra Nevada earlier this year and converted in DXO Optics Pro (Elite) v4.1. I have not put up the other photo as at this size a significant difference is not visible.

Saturday 16 December 2006

Photoshop CS3 (beta)

The beta version of Photoshop CS3 (full version expected in April or May 2007) became available yesterday (download the beta). What is of great interest to me is to see if the RAW converter and other features within the program can compete with both the new and established features in DXO Optics Pro (v4.1). Obviously Photoshop does a lot that DXO doesn't, but it is in the areas where DXO excels that I will be looking for Photoshop to match it or not. My thoughts and findings coming soon - tomorrow if possible.

Tuesday 12 December 2006

Getting the most from your lenses


Do you fancy upgrading some or all of your lenses? Have you been coveting one of those "top of the range" lenses that you've seen advertised? Buying this type of lens will usually result in an improvement in image quality (note the use of the word "usually"), but are you getting the best from what you have, and is your technique up to those better lenses. I read some time ago the opinion that most lenses are better than most photographers. The point being that we tend to concentrate on trying to buy our way to better images rather than learning to do better with the equipment we have. It could be that improving technique could result in as much of an improvement as paying large amounts of money for better glass. Even if you decide to go ahead with the purchase, at least you will be harvesting the greatest reward from your investment.

So here are a few ways of getting better images from the lenses that you have. First, use a tripod whenever possible. I mean a good one with little or no plastic (you may recall my previous rant on this subject).

In high winds wrap the camera strap round the tripod (or tape it up) to stop it swinging around in the draft. If you can stand up-wind of the camera to act as a windbreak without turning the shot into a self-portrait, do so. Do everything you can to keep the tripod solid. On soft ground you may need to find large flat stones (if possible) or similar to put under the feet. Sometimes hanging your camera bag from the tripod will help.

Use a cable release (remote shutter release) or the camera's self-timer. Removing the movement and vibration caused by you operating the shutter release directly will give sharper images at all but the fastest shutter speeds.

Use mirror lock-up (if available on your camera - only for SLR users). The reason is the same as for the previous point. To have a piece of glass flapping around inside the camera fractions of a second before taking the image is not a great idea.

If your lens has image stabilisation use it, assuming that it is the later kind that does not get freaked out by being used tripod-mounted.

If there is no reason not to, use the lens at it's best aperture (your subject may dictate otherwise). If you have taken test shots at different apertures (with zooms, at different focal lengths also) you will have an idea where that is. Most lenses perform at or near their best stopped down a couple of stops from wide open, but don't take my word for it. Check for yourself.

Do all the stuff that I talked about in my piece on flare - make sure the lens is clean, use a lens hood etc.

The last point may seem too obvious for words. Focus carefully. Try this. Focus on something. If your lens has a distance scale check exactly where it is focussed. Focus again. Check the scale again, and there is a very good chance that the scale will be in a slightly different place. I remember trying this with a manual focus lens and marking the focussing ring with a soft pencil. I tried it about five times. I had five marks on the lens, all very close, some touching, but not in exactly the same place.

If you can't use a tripod (street photography for instance) and therefore can't use mirror-lockup or a remote shutter release do everything you can to make yourself as stable as possible. Support the lens with the left hand, keep elbows tucked in to your body as much as possible. If you can, lean against something like a lamp post or wall. Using a monopod may be an option worth considering if a tripod is out of the question.

Keep in mind that most of these points apply much more to the use of long focal length lenses than to wide angle ones.

Image: Norway 2005

Monday 11 December 2006

Image Storage - keeping them safe (part 2)


In the first part of this piece I took a look at the likely risks to your digital files. In this second part I present my thoughts on some of the available solutions. The aim is that the files will still be usable for an indefinite period of time. There are a number of measures which in combination are likely to achieve this.

Lets assume that hard disk failures are a fact of life (because they are - its not if, but when). But the risk of data loss can be reduced to almost nothing by storing the images on more than one drive. This can be done manually, by using some sort of backup utility (a piece of software that copies and ideally verifies your images to a second location) or by using several hard drives in a RAID (Redundant Array of Inexpensive Disks) configuration. A RAID is a collection of hard drives that are set up to appear to the user just as one drive would. Mirroring (RAID 1) is where two or more drives hold the same information. Data is written to both/all drives simultaneously. If one fails the data is still on the other/s. A replacement drive is swapped for the faulty one and the RAID is rebuilt. In this set-up a RAID of two 500GB drives gives a usable space of 500GB (half of the total capacity, because the information is duplicated). RAID 5 requires a minimum of 3 drives and splits the data between them in such a way that if one drive fails the data can be reinstated from the other drives. If you had four 500GB drives in a RAID 5 configuration you would have 1,500GB usable capacity (total capacity minus the capacity of only one drive). This makes RAID 5 a more efficient proposition if more than two drives can be used (For much more on these and other RAID configurations read this page on Wikipedia).

So it looks as though a RAID is a good idea. It is, but it is not the whole solution. A RAID will not protect you against corruption of data. Some sort of removable media is the best solution so that you can at least go back to your original files. There is a question-mark over the longevity of some brands of CDs and maybe to some extent DVDs. The best bet for long life is to use DVD-RAM disks. These are much more robust than other types of DVD. They are available open (like CDs and other DVDs) or in caddies. The caddied versions are protected from dust, fingerprints and scratches by being in a case, and so are a better option. You will need a drive that can accept caddies, and most drives don't, but suitable drives are available and are inexpensive.

Lastly, what happens in the event of fire, theft or flood (can't think of anything else, as rampaging herds of wildebeest aren't likely round here)? Well you may need to get a new computer on the insurance, and maybe even a new house, but if you have an offsite drive (one that is housed at another location) your images will still be safe - as long as it wasn't a very widespread flood.

Apply all of these measures and you should be able to enjoy your photos for many years. Here's to a long future for your images and mine.

Image: Lake District 2005

Thursday 7 December 2006

Photography with flare


Do your photos have flare? Yes, those little spots of colour running across the image. They weren't there in the scene that you saw were they. Or maybe there is just a strange type of fog wafting across your image. That wasn't there either, was it. The likelihood is that what you are seeing is flare, caused by light bouncing around between the elements of the lens. The light itself may not have been visible within the viewfinder image, in which case the chances are that it was just outside the frame when you took the photo.

I recently talked about introducing flare into an image with the intention of conveying a sense of intense light. But sometimes flare creeps into our pictures when we would prefer that it didn't.

There are a number of things that we can do to stop the light flaring into the lens. On all but the widest lenses a lens hood is an essential. Many lens manufacturers sell lens hoods designed specifically for a particular lens, and these are normally made out of rigid plastic. Sometimes they even come supplied with the lens (why is this not standard practice with every manufacturer and on every lens?). The idea is to cut out any light that is not going to form part of the image. If you don't have a hood for every lens that you own then may I suggest a trip to the camera shop is in order.

The biggest shortcoming with lens hoods occurs with zoom lenses, and because most people predominantly use zoom lenses these days this applies most of the time. The hood must be designed so as not to be visible in the image at the shortest focal length (widest angle of view). It follows that at all other focal lengths the hood is not working as efficiently as one might wish. Also, many lens hoods are cut off straight at the end. Now it is true that the lens receives a cone of light, but the image is rectangular, so a rectangular lens hood (or petal lens hood) is more efficient in most cases.

For studio work I often use a bellows lens hood, which is square, but as the format that I use is not square but an elongated rectangle there is still some room for improvement. In the studio it is common practice to put pieces of card in between the lens and any light that might otherwise shine into the lens, so as to cast a shadow in the direction of the lens. This is referred to as a flag. The same method can be used when outside by holding something by hand so that it casts a shadow on the lens.

Of course the light source might be within the image. Much of the time and with most lenses there is just no way round the fact that this will cause flare. In many situations we can at least have some control of how the flare shows in the image. To minimise flare the lens should be clean. Dust and fingerprints on the lens will scatter light, reducing contrast. Using a smaller aperture will reduce the size of the little disks of light that you often see if the sun is in the frame. Finally, see if it is possible to manoeuvre so that the light source is at least partially behind something - the branch of a tree for instance. This can give you a degree of reduction in visible flaring (see the picture that accompanies the piece called "Doing it with flare").

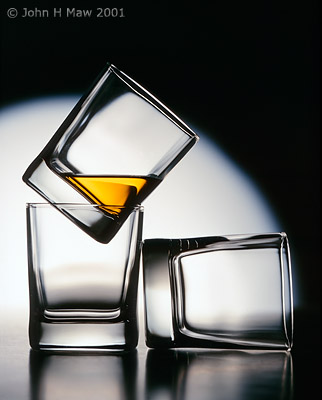
The image above was taken directly into the only source of illumination. Flare was avoided by using a good quality lens which was free of dust and fingerprints (Schneider Symmar-S 240mm on Sinar P). A less diffused light source would be more likely to generate flare.